


Reverse engineering checkra1n stage2(pongoOS) and stage3(kpf) binary
Note: The related binaries can be found on https://github.com/NyaMisty/pongoReverse
Motivation
I’m currently settled on iOS 12.1.1, which is a version totally unsupported by checkra1n team. I want to use checkra1n on this device, but I also definitely know that checkra1n team won’t add support for these old iOS versions in a forseeable future :(
So I decided to make it myself. For the stock checkra1n, the kpf failed obviously, and pongoOS will also crash when trying to disable kpf using bootux command.
That’s disappointing. What making it even more frustrating is that I forgot my DCSD cable and Kong cable at school, which is now entry-prohibited due to the coronavirus outbreak, so I can neither get quite a lot debug output generated by iBoot and pongoOS, nor debugging the iBoot using JTAG.
But I decided to do something. Through without cables, I can still play around with the pongoOS and PongoKit. However, checkra1n team didn’t release any pongoOS related documents except the header file pongo.h, making it a totally blackbox just like AAPL. So to debug and make module for pongoOS, I’ll have to reverse engineering it first.
Get the binary
Checkra1n team bundles everything into a single executable file. They obfuscated the executable using a custom LLVM based obfuscator called Hikari made by my friend James, so there’ll be very much difficulty if you’re trying to directly analysis the executable.
However, according to public logs and documents, checkra1n should split into 4 parts: Exploit for SecureROM, Stage2 loader for iBoot (pongoOS), Stage3 kernel patchfinder (a.k.a kpf), and Stage4 bootstrapper. Executable like pongoOS and checkra1n kpf are running on bare-metal ARM, so they won’t be heavily obfuscated, and we can easily obtain them by capturing the USB traffic.
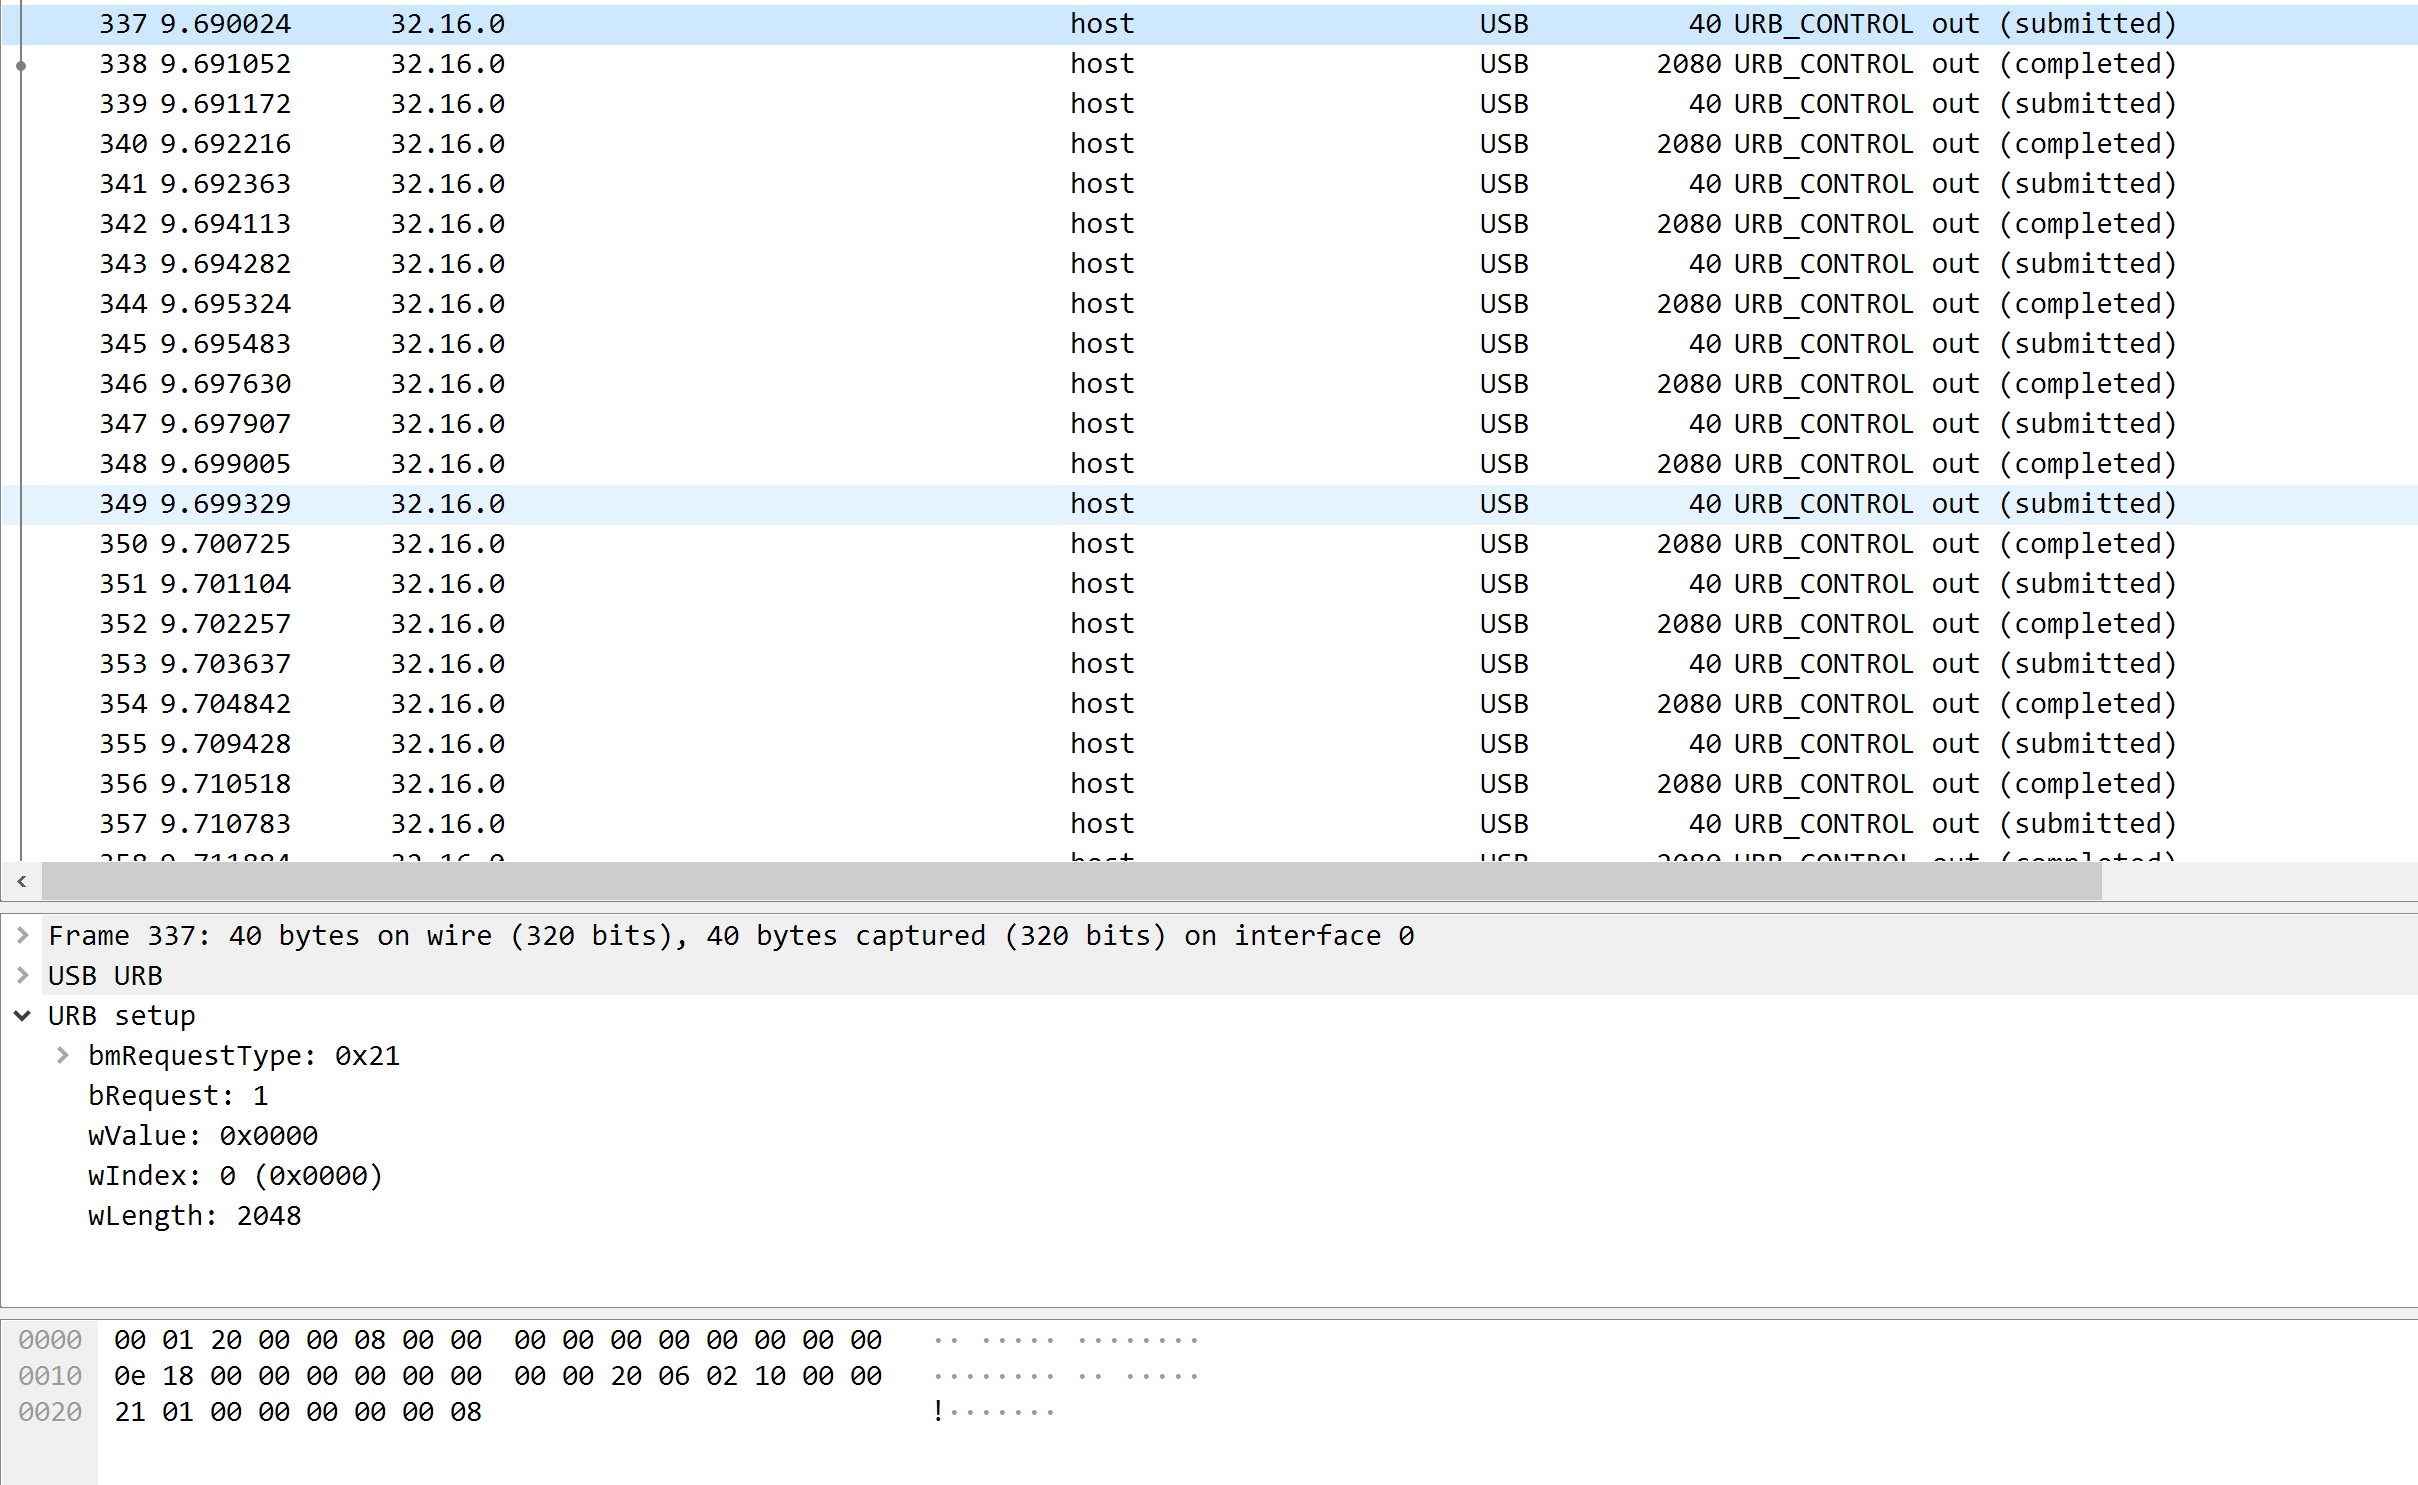
Using Wireshark on MacOS and following this instruction https://wiki.wireshark.org/CaptureSetup/USB#macOS, we can quicklly get a traffic dump. Because executables are usually something large, so we can filtering those packets based on packet length. Also note that the checkra1n usb request type is 0x21, which is documented in PongoKit.
With these information, you can easily find the stage2~4 payload like this:
Now we got the payload data. As long as we have the payload data, we can do any operation to it freely. Wireshark doesn’t have the “Follow traffic” functionality for USB, so we have to manually reconstruct the payload. For me, I exported all those packet with 2080 length to C source using Wireshark’s “Export Packet Dissections”, then stripped the USB header and fwrite it into a whole file.
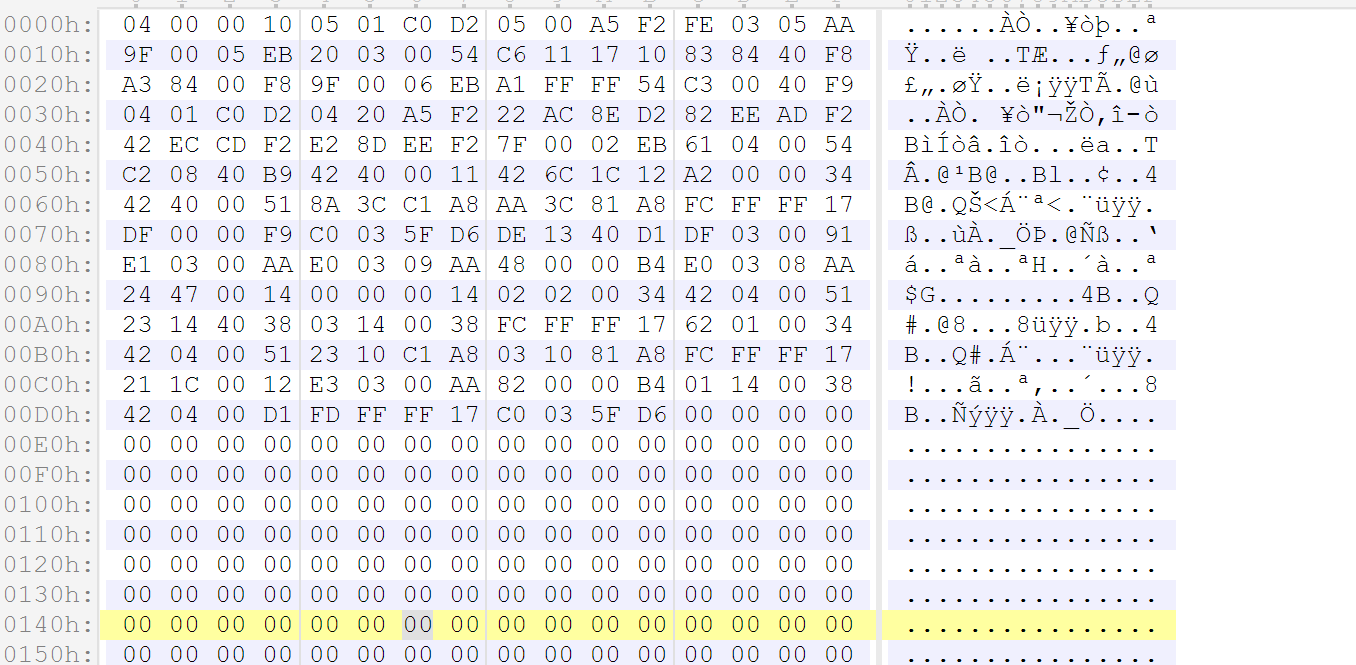
The first part should be pongoOS, which should look like this:
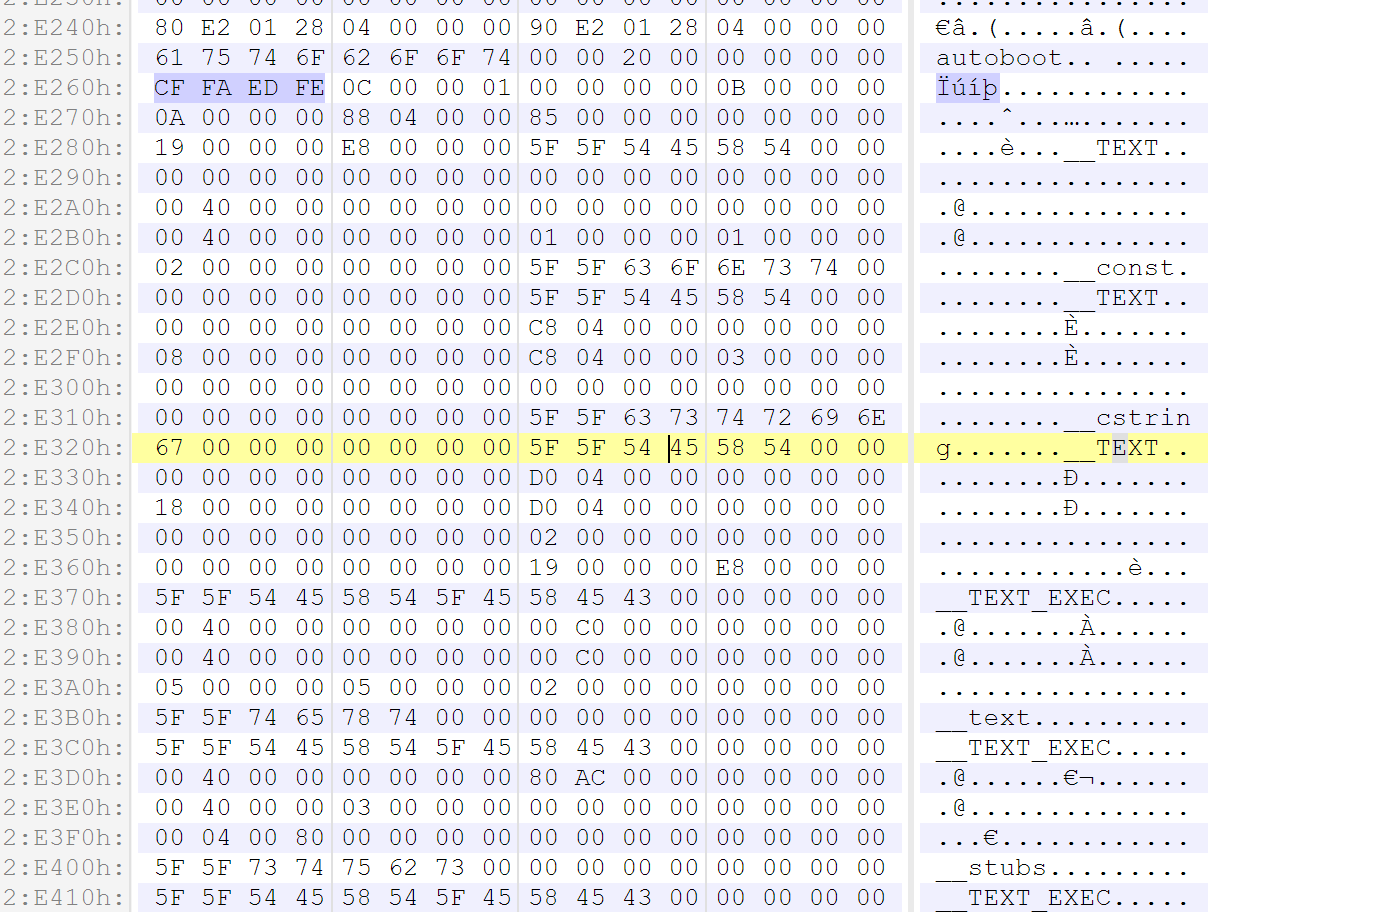
The second part would be kpf module, which will be a MachO file. You can search the MachO header magic 0xfeedfacf to locate it
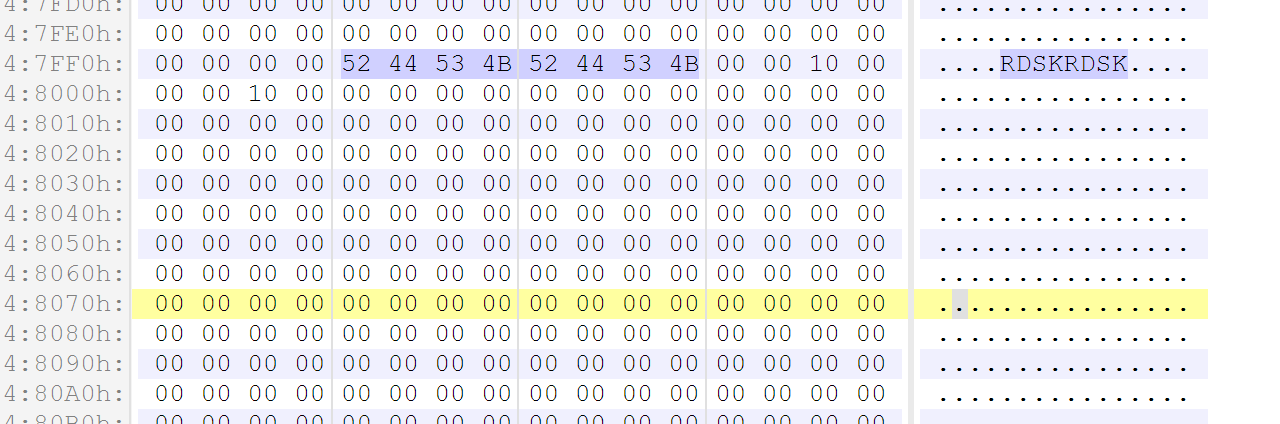
The third part would be a ramdisk, which can be found using magic RDSKRDSK:
Analyze the stage2 (pongoOS)
Loading it self
Simply load the image into 0x0 address, and then you’ll find that it’s copying the whole payload into 0x828000000, and return to that address to re-execute start


Hijacking iBoot
This time it instead calling the initial function (which I renamed to do_autoboot). In fact this function is called twice, once when the SecureROM trying to boot the iBoot, once when the iBoot trying to boot the kernel. It will check whether the additional boot info is available to check whether it’s patching the iBoot
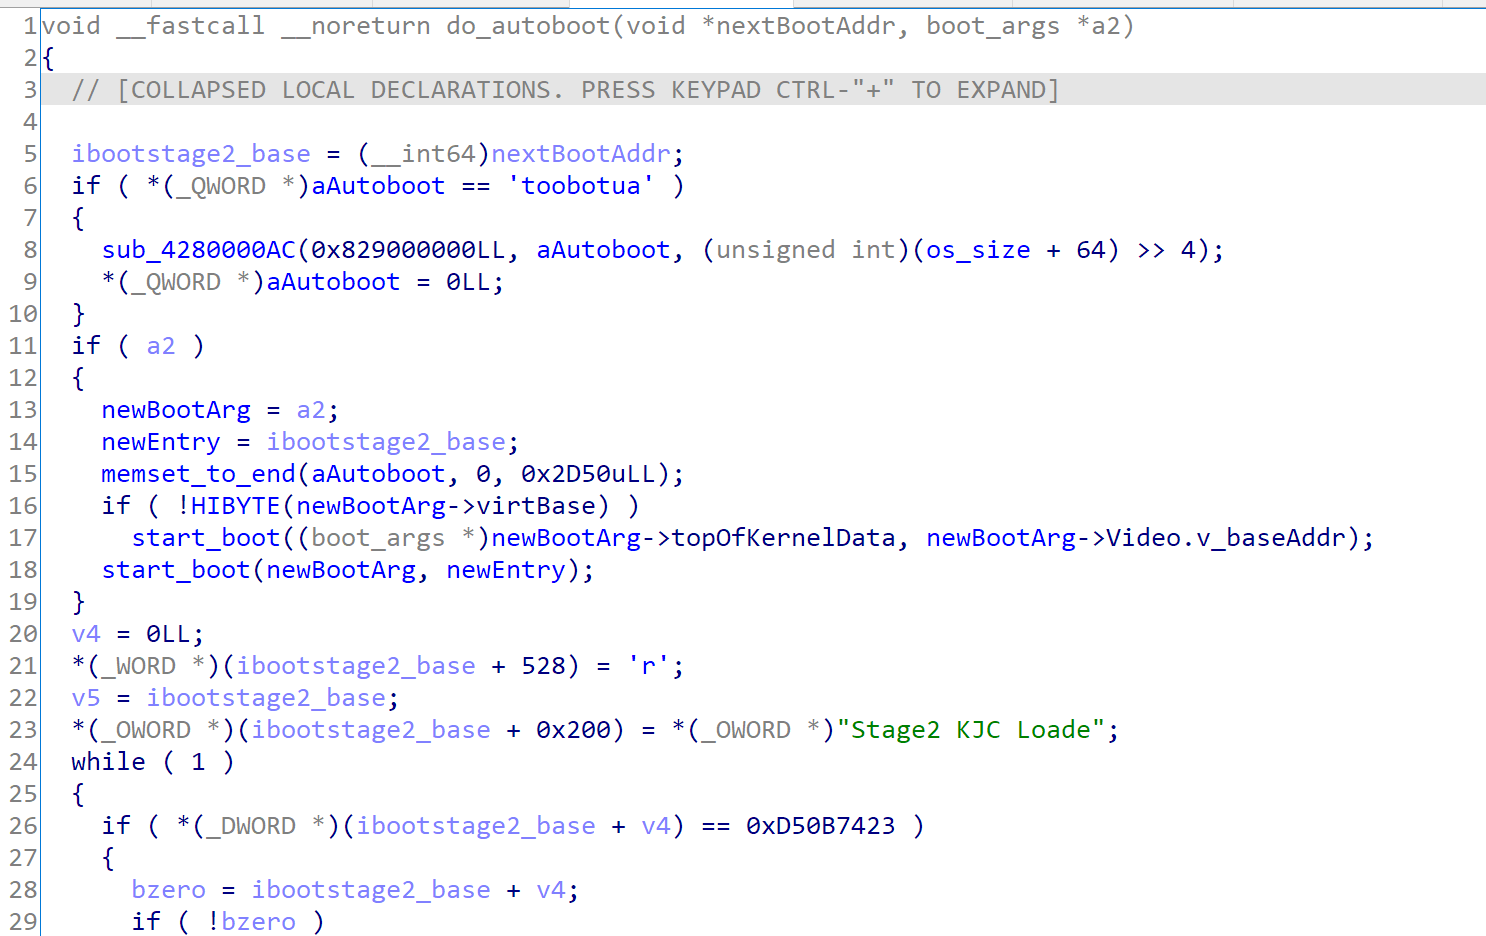
For the iBoot, it will do the following things:
-
- patch the iBoot version string to Stage2 KJC Loader, which is located at iBoot+0x200
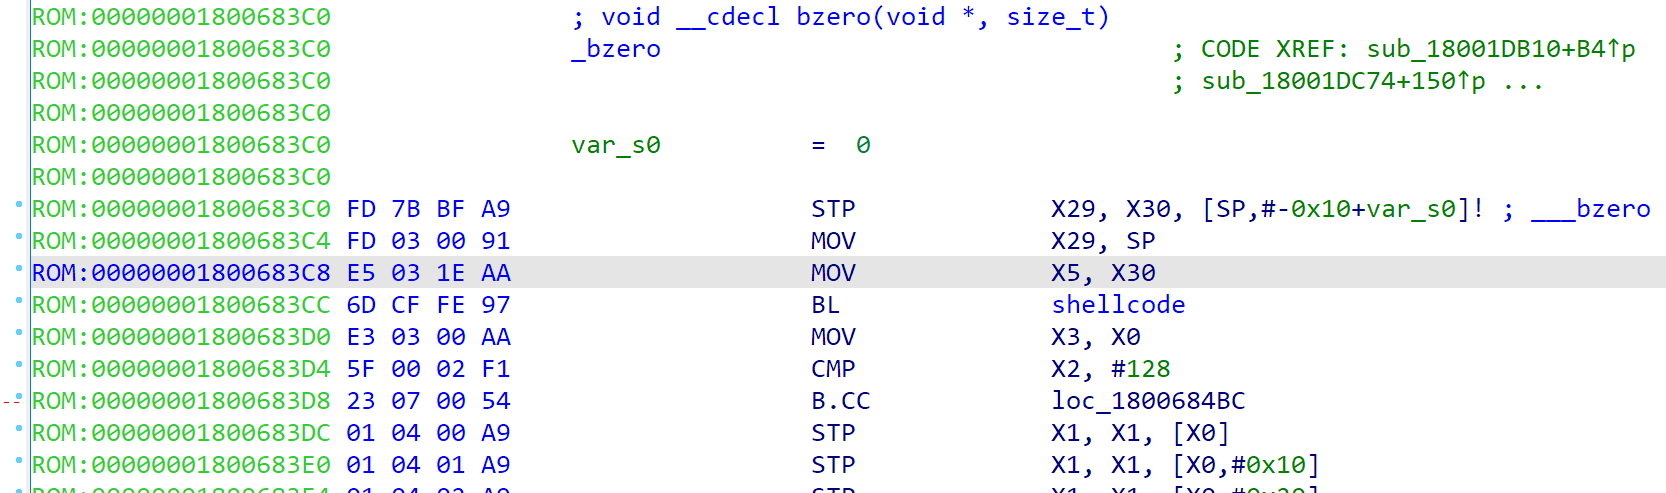
- find the ic iallu instrucution in bzero func and does an inline hook, which will check whether the bzero argument is 0x828000000- 0x829000000,to prevent memory from being zeroed
- find the boot trampoline which has an unique instruction MOV X18, #0, and patch it the next boot address to 0x828000000
- continue to call iBoot, and wait being called from the iBoot boot trampoline
Main loop
When iBoot jumping to the kernel, it will also enclose a boot_arg struct as additional boot argument, so it will trigger our do_autoboot into calling start_boot
In the start_boot, it will initialize gBootArgs and gEntryPoint which are exported in the PongoKit, and then set up Excetion Vector table for pongoOS. After that, the main_loop is called.
When we come to the main_loop, the pongoOS alive, and it will start to initialize all sorts of things including screen, USB, task subsystem, IRQ handler, and then start the task dispatching loop.
Of course, before starting the dispatching loop, pongoOS will register the initial task first.
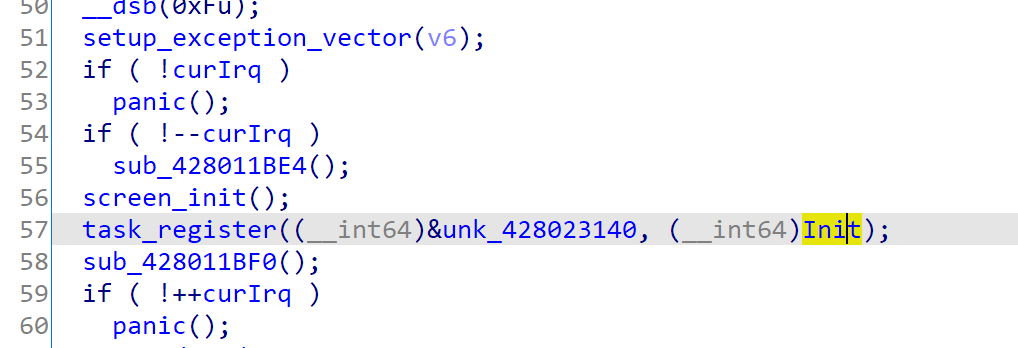
Init task
In the init task, uart serial are initialized, banners are printed, and all builtin commands are registered. 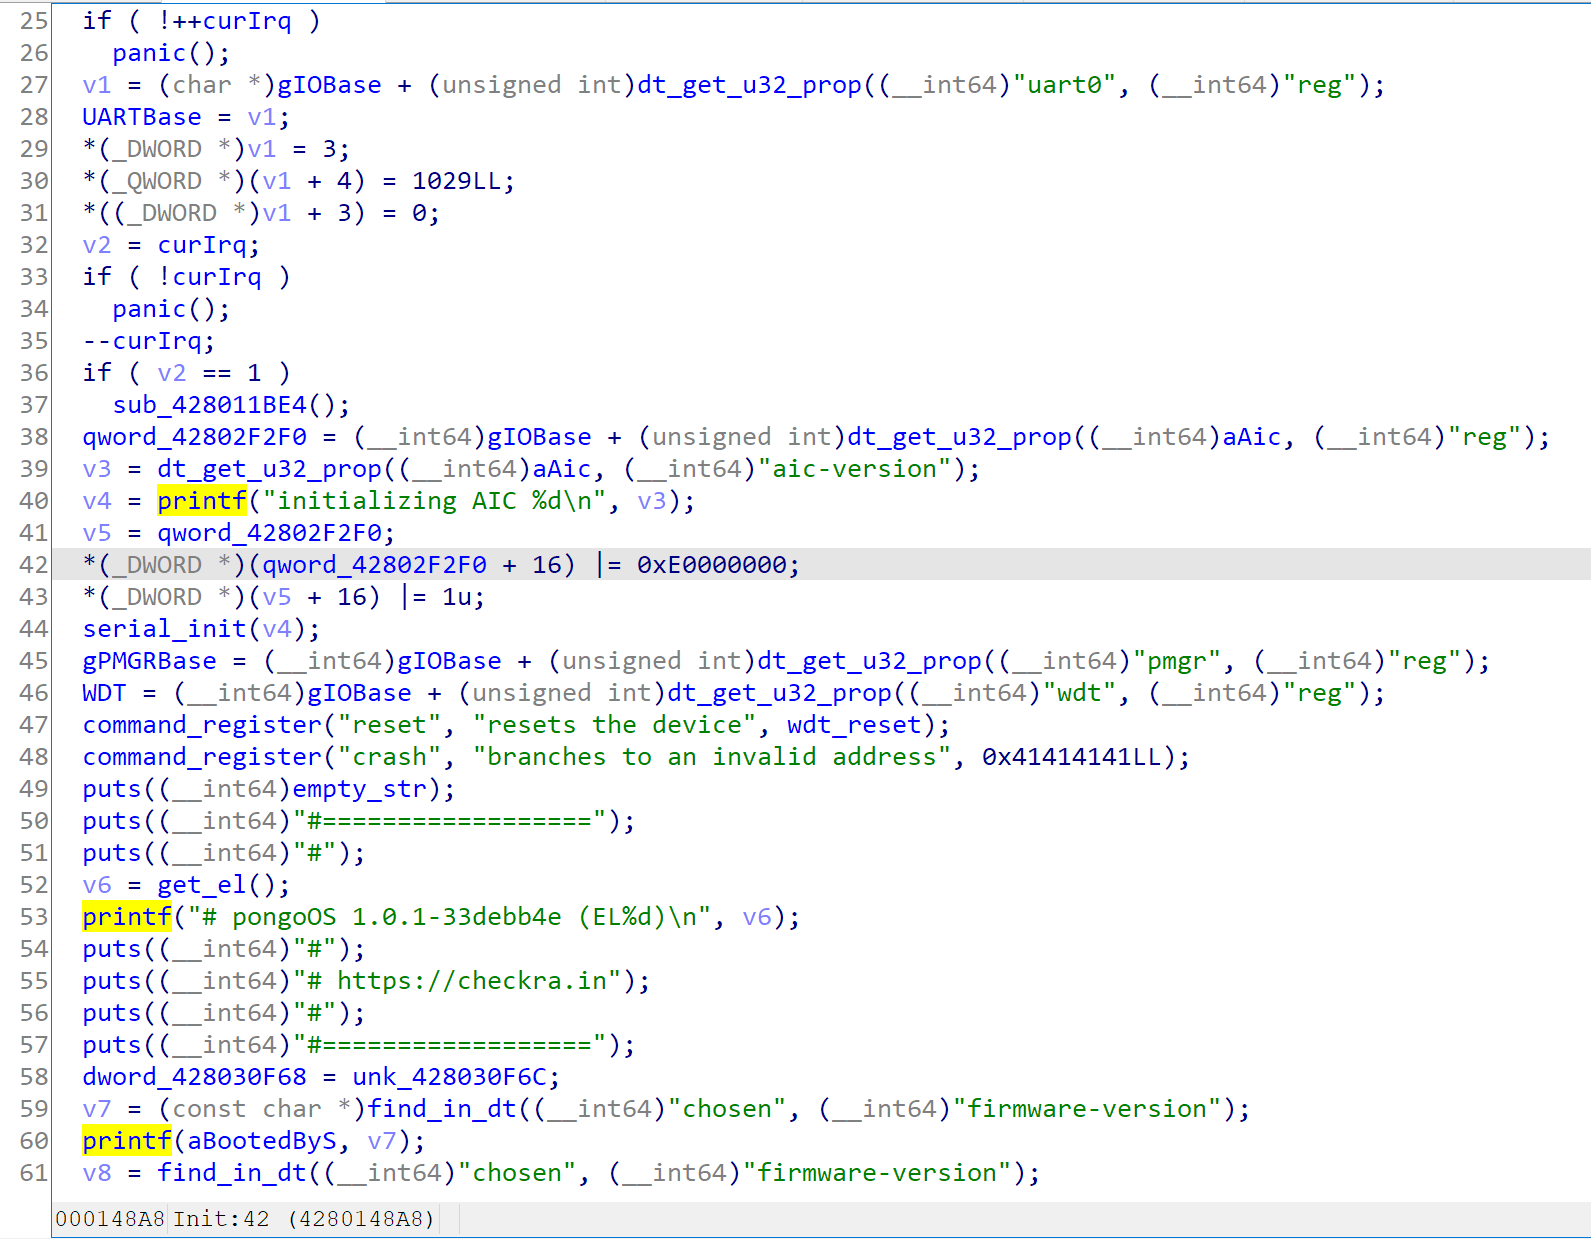
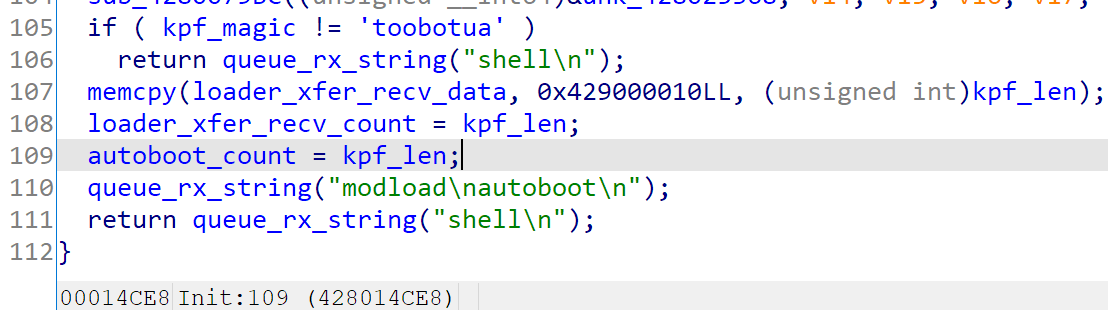
Then it will detect whether kpf is present and loading it using mod_load, and calling its autoboot command.
After kpf finishes, it will call the registered bootx command to boot the XNU kernel. The bootx command will set the cur_boot_type to 2.
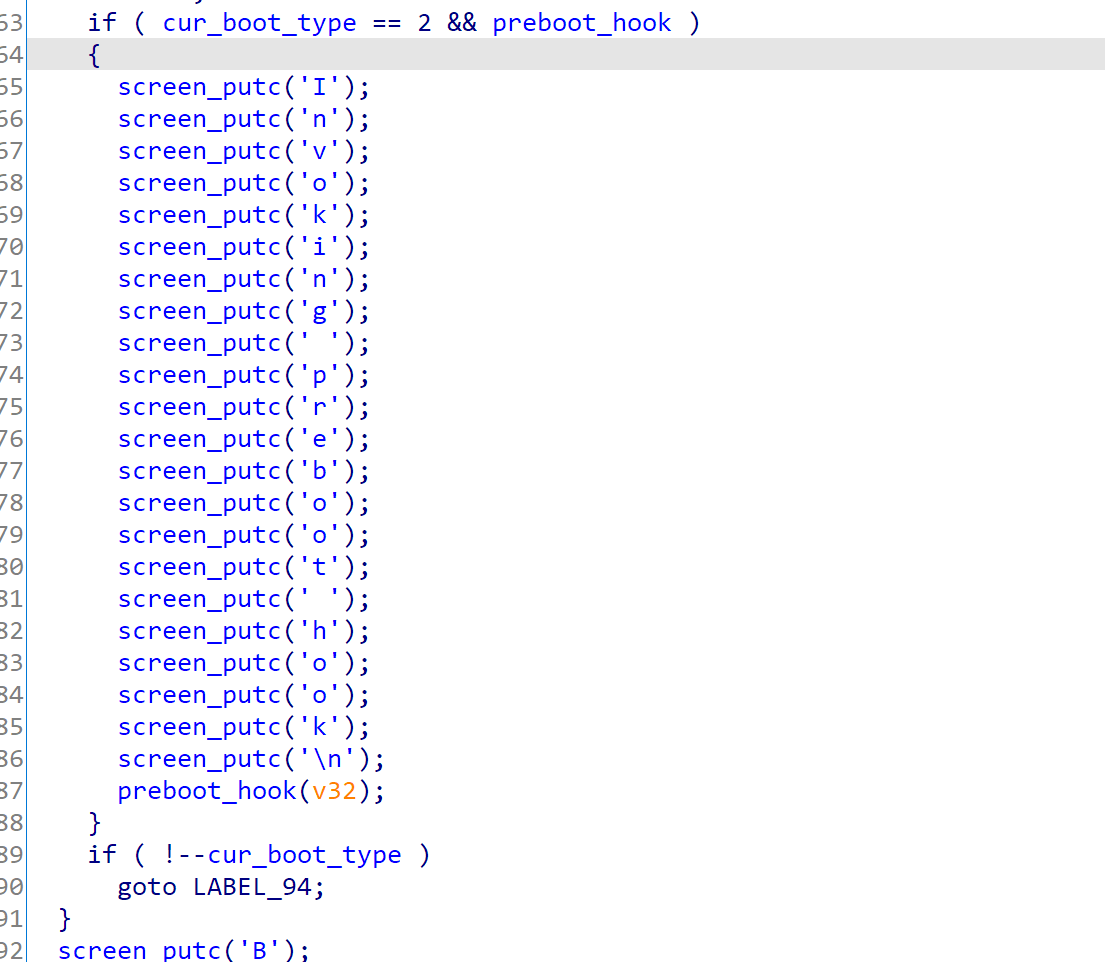
Booting
Once the cur_boot_type variable is not zero, the task dispatching loop will stop, and main_loop will continue to boot.
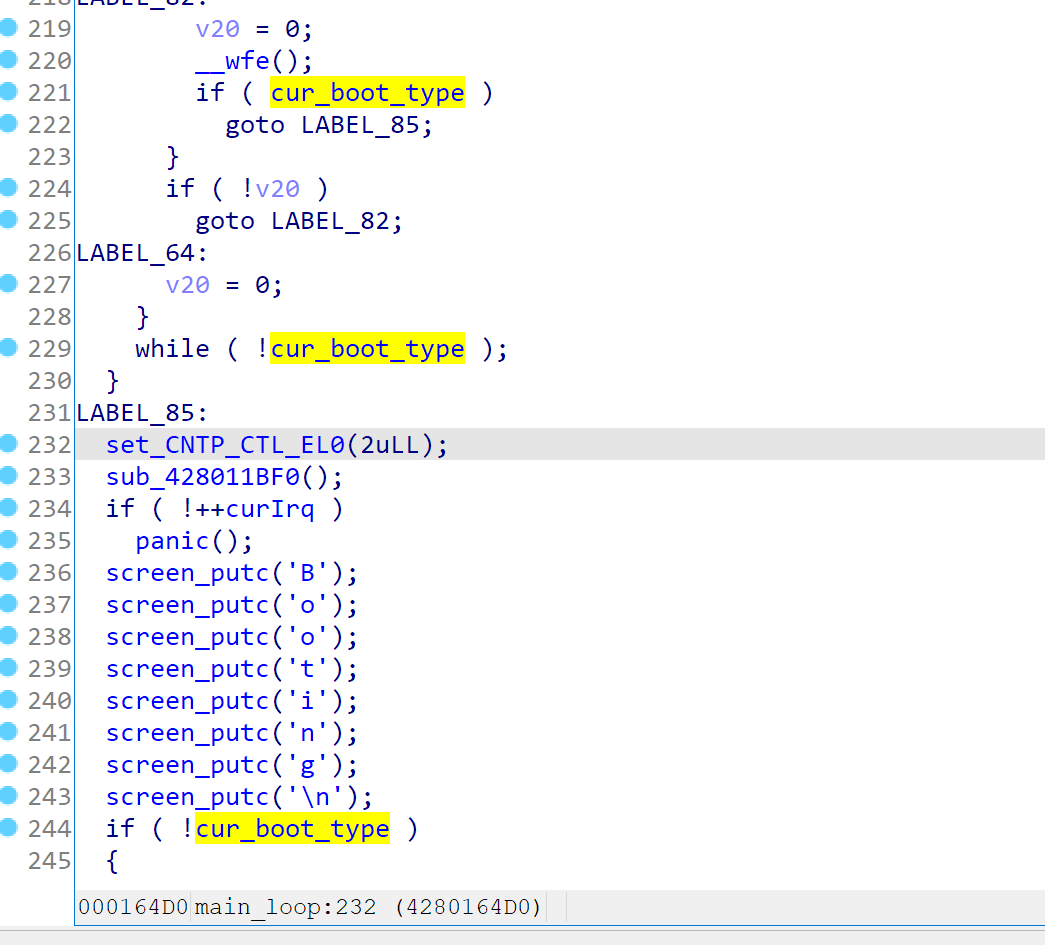
It will first check the preboot_hook, and then fall through into bootux’s logic (which is in fact cur_boot_type == 1)
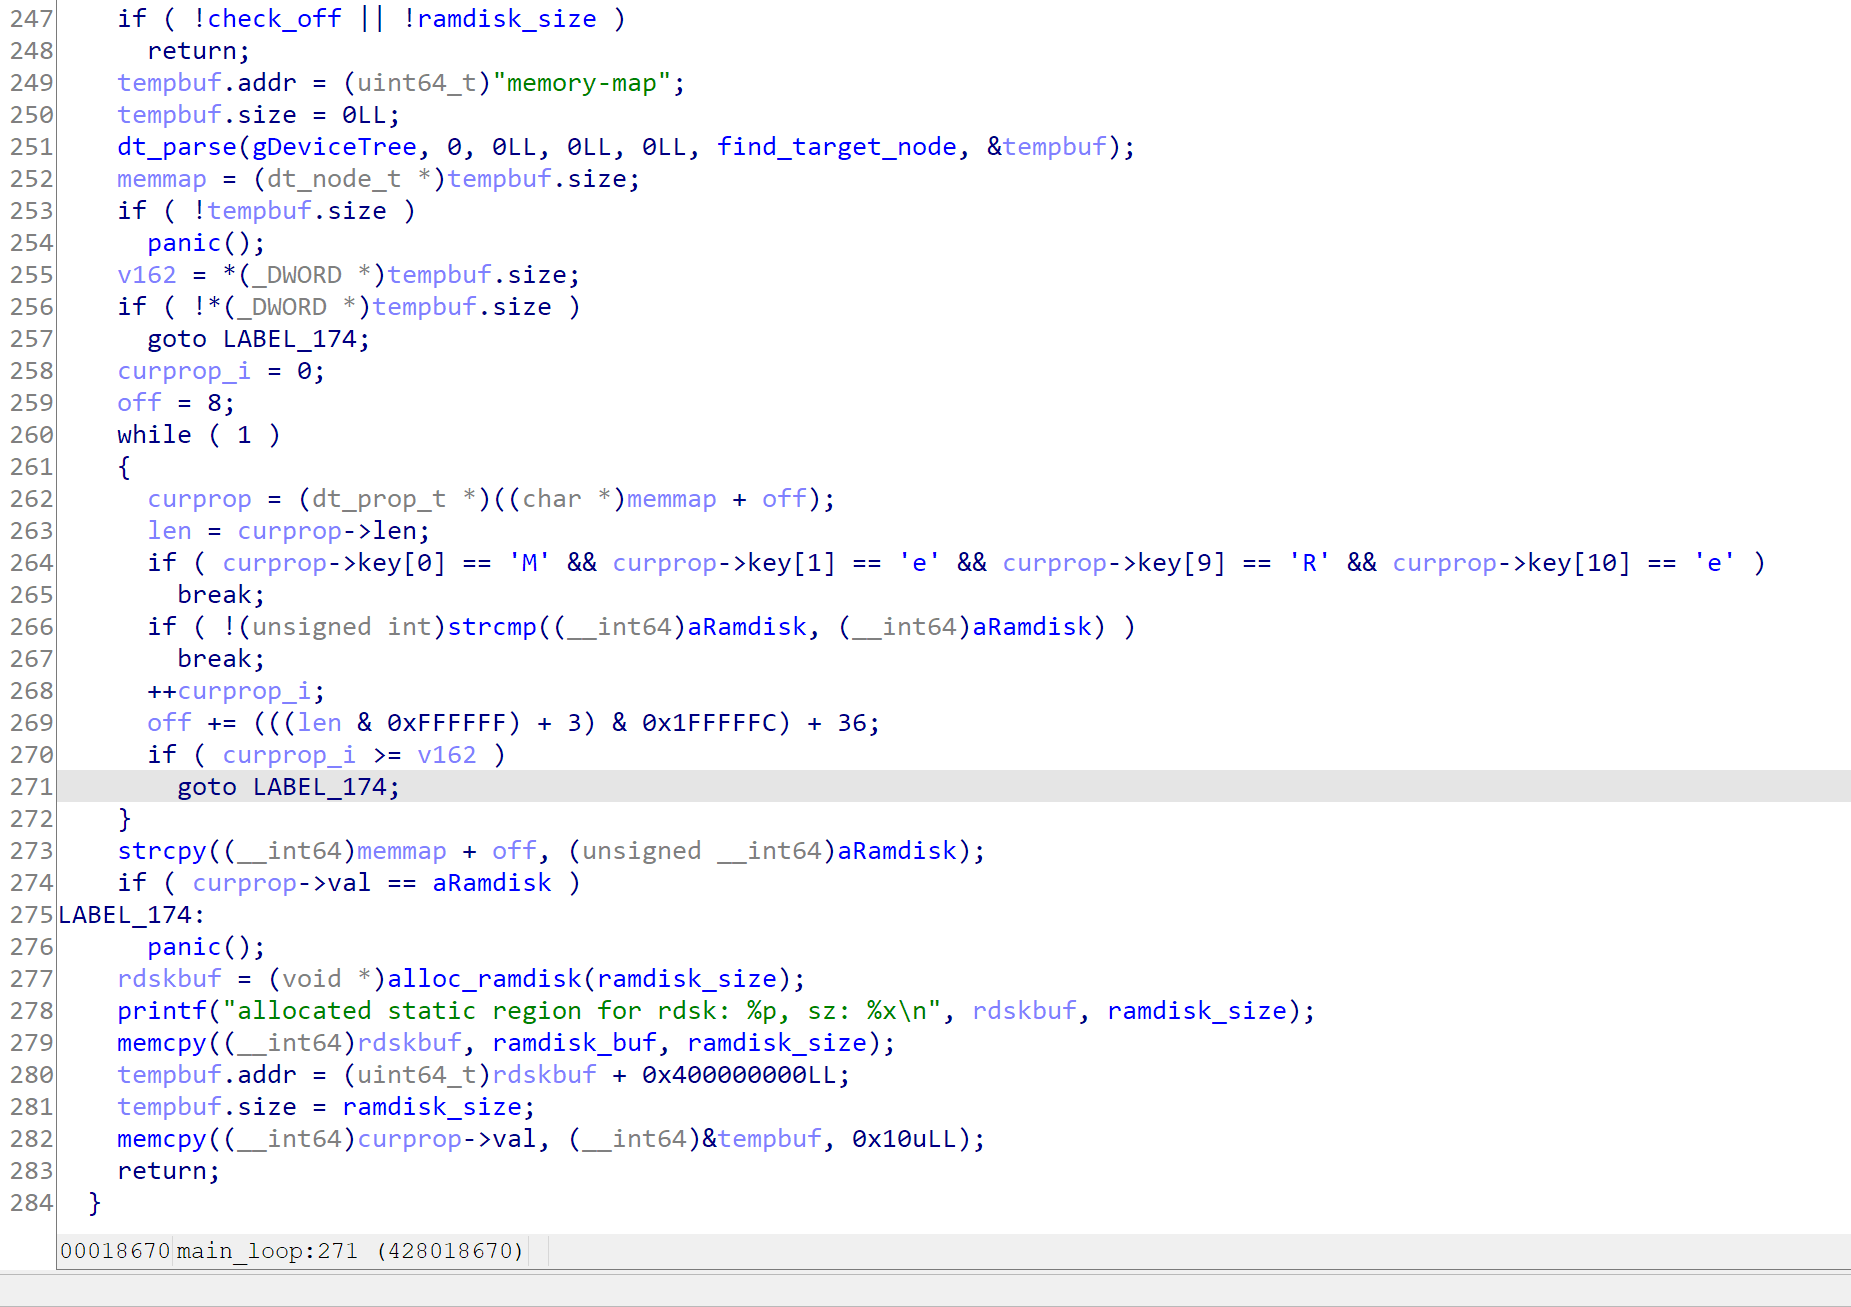
After that, pongoOS will check if an additional ramdisk is present. If present, it will find a slot (MemoryMapReserverSlot) in memory-map, and then attaches the ramdisk onto it.
(Note that there is an strcmp(aRamdisk, aRamdisk) there, which will always be zero, so if the first entry in memory-map is not the free slot, it will fail immediately haha)
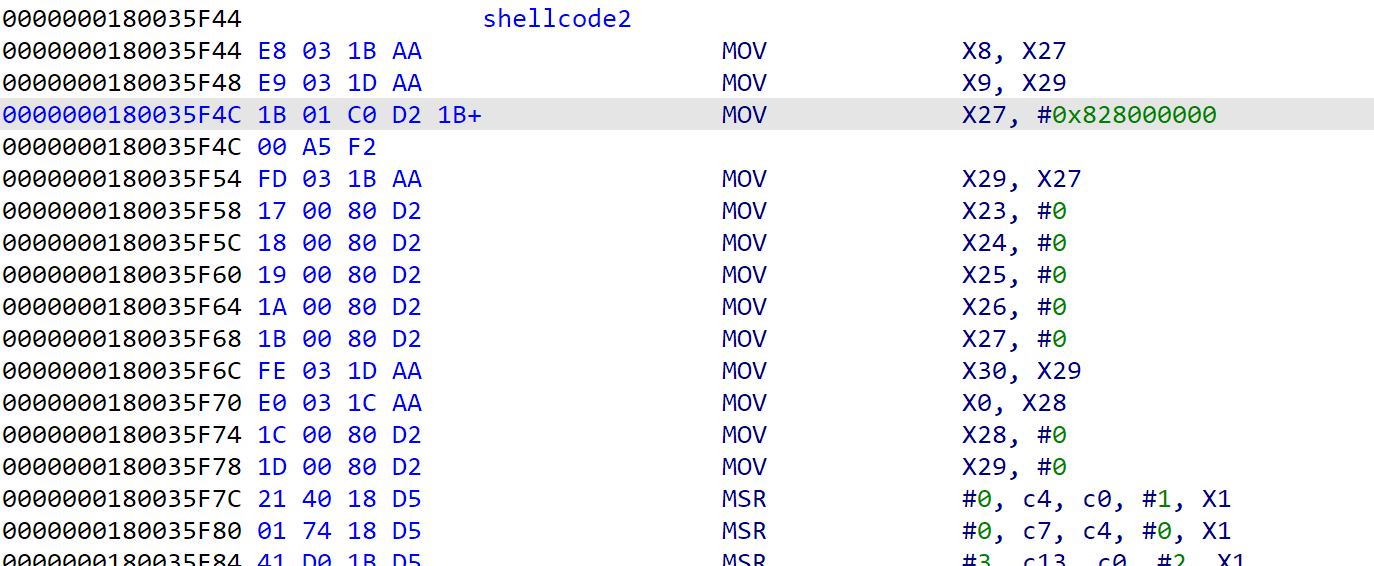
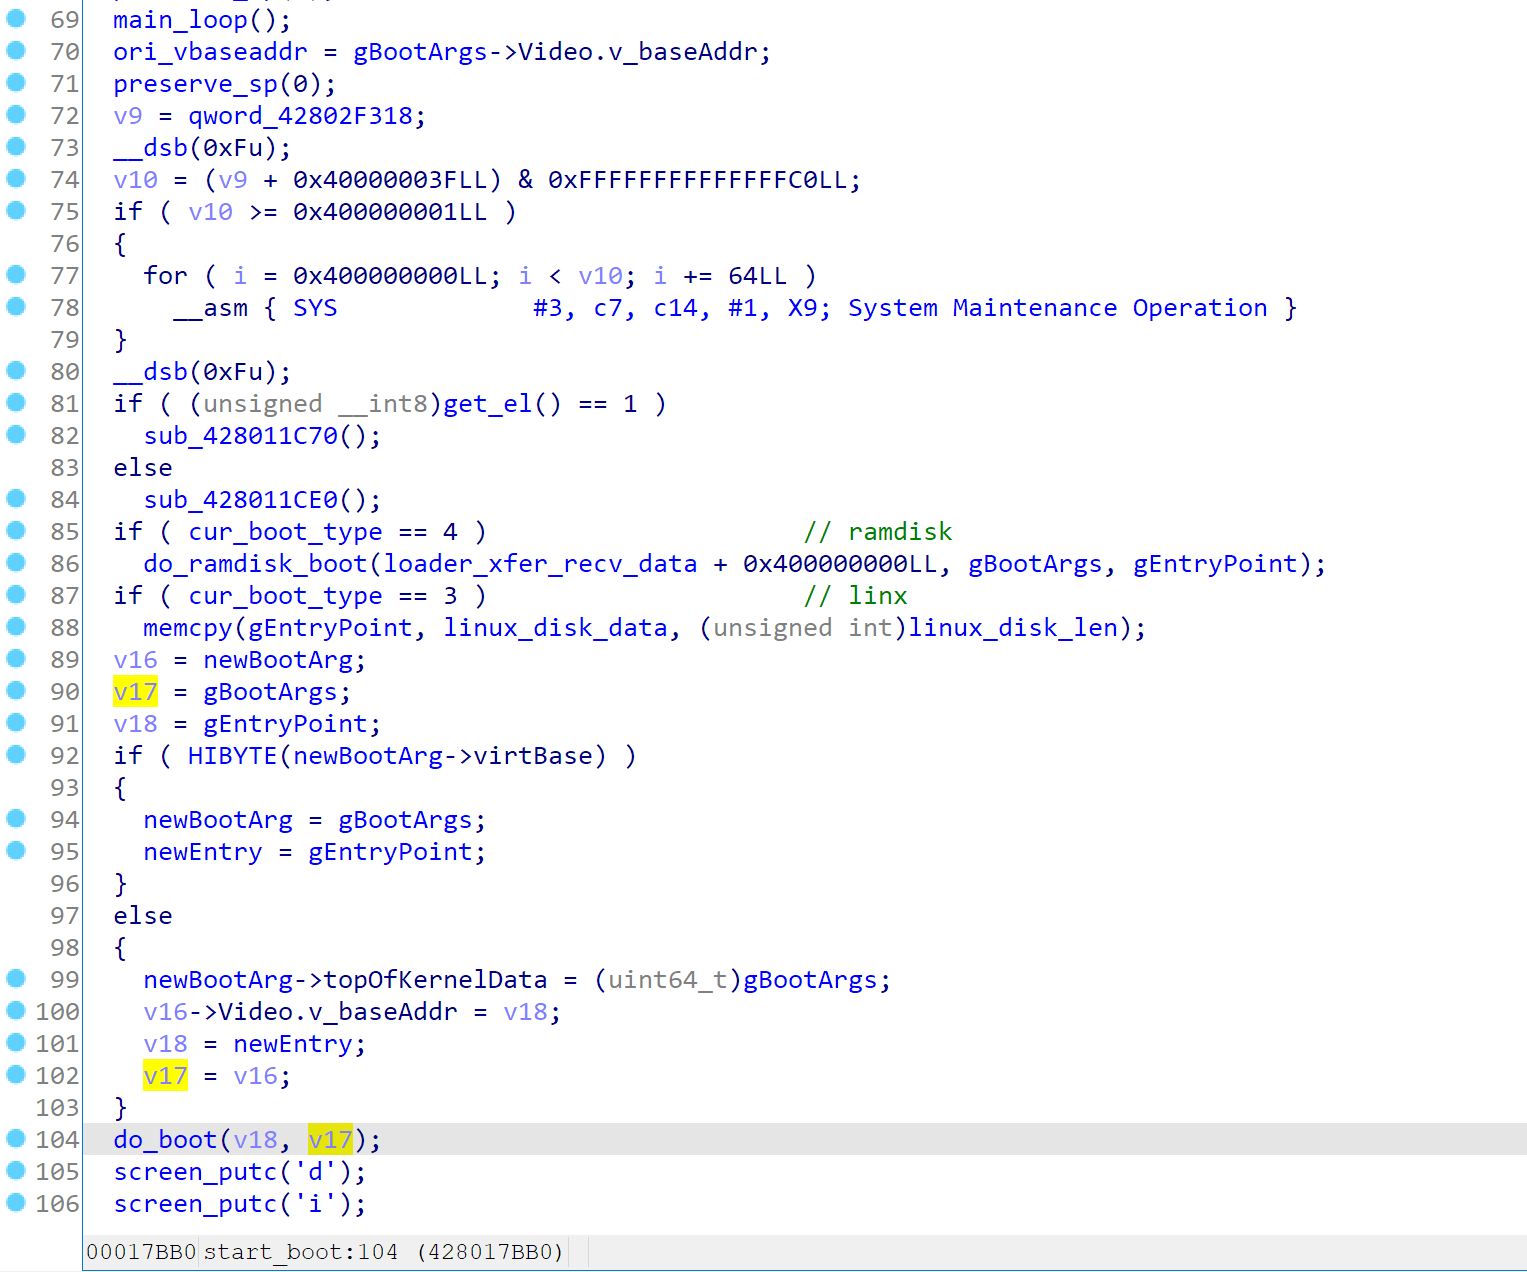
When completed, it will return, which will go back to the start_boot function. At there, it will clear all sorts of special registers, and jumping to gEntryPoint using do_boot function
(In fact, in the pongoOS from checkra1n 0.9.8 there has been already partial Linux booting support, the FDT is already constructed)
(Caveats & Funs)
In fact analyzing the whole pongoOS from the entrypoint is really hard, so instead I firstly located the whole code segment, and making them as function in IDA using script. Then I found symbol table for the modload command, and renamed those functions. From those commands, I traced up, and understood the whole process :)
Also, it seems that pongoOS is using an full-fledged libc, which make the printf function very very big, so I marked all those functions as decompiled in case I forgot.
Analyze the stage3 (kpf)
Deobfuscate
The kpf module is a standard MachO, so checkra1n team obfuscated it using Hikari as expected. But as they are still on a the bare-metal, they did’t enable all obfuscation methods, only string encryption and simple bcf are enabled.
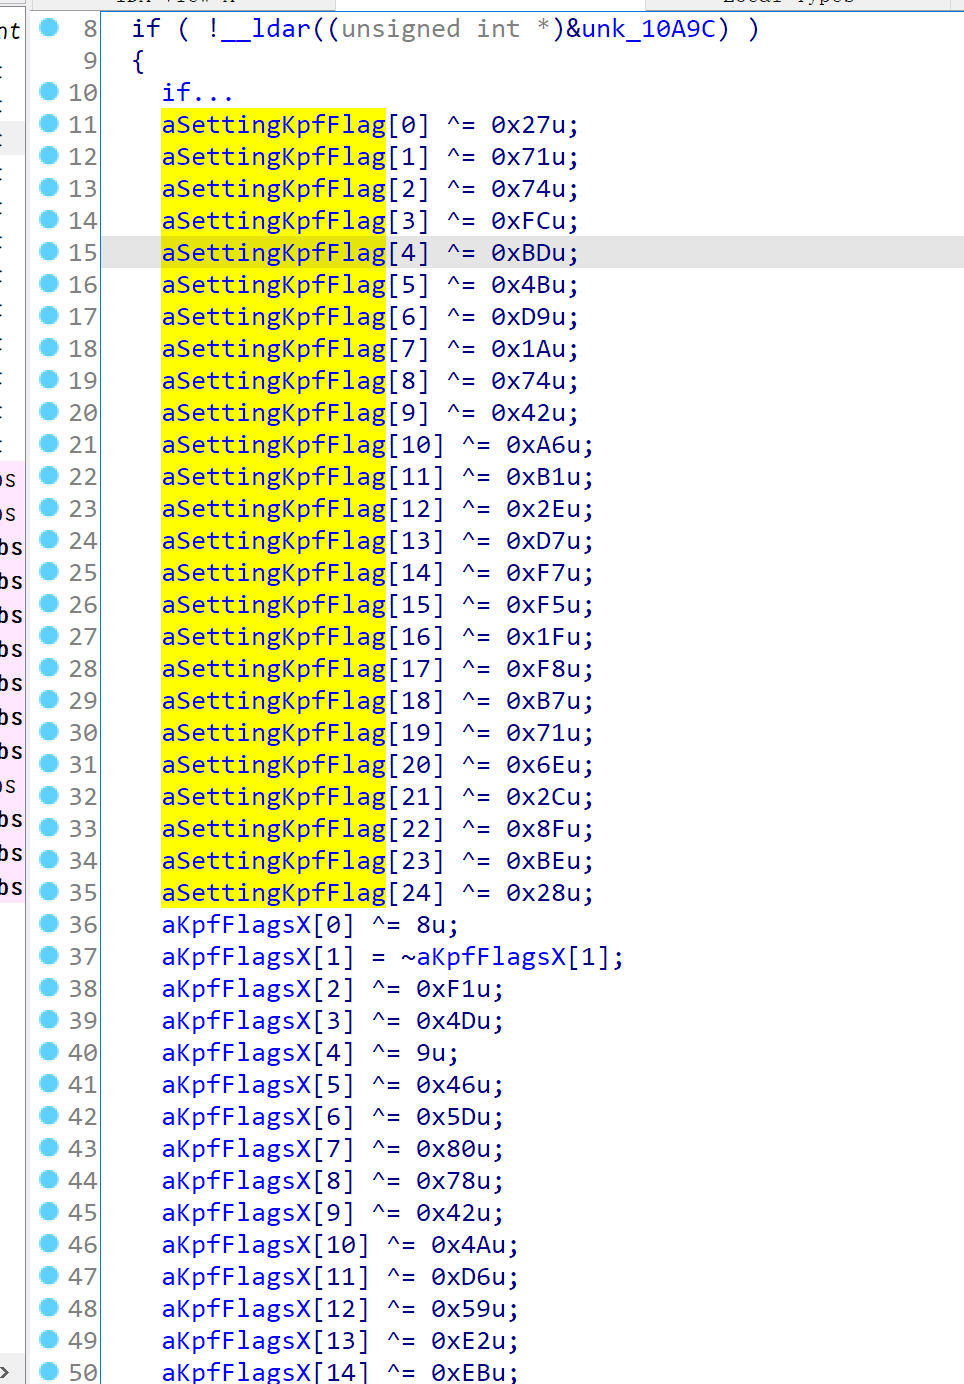
As y0u can see, there’s ^= and ~=, so I made a script to parse the HexRays generated code, and then decrypt and patch them in IDA database. Then everything goes well :)

Module entry
Every pongoOS module will have an _module_entry function. kpf’s one simply registered kpf_flags and autoboot command and setup the preboot_hook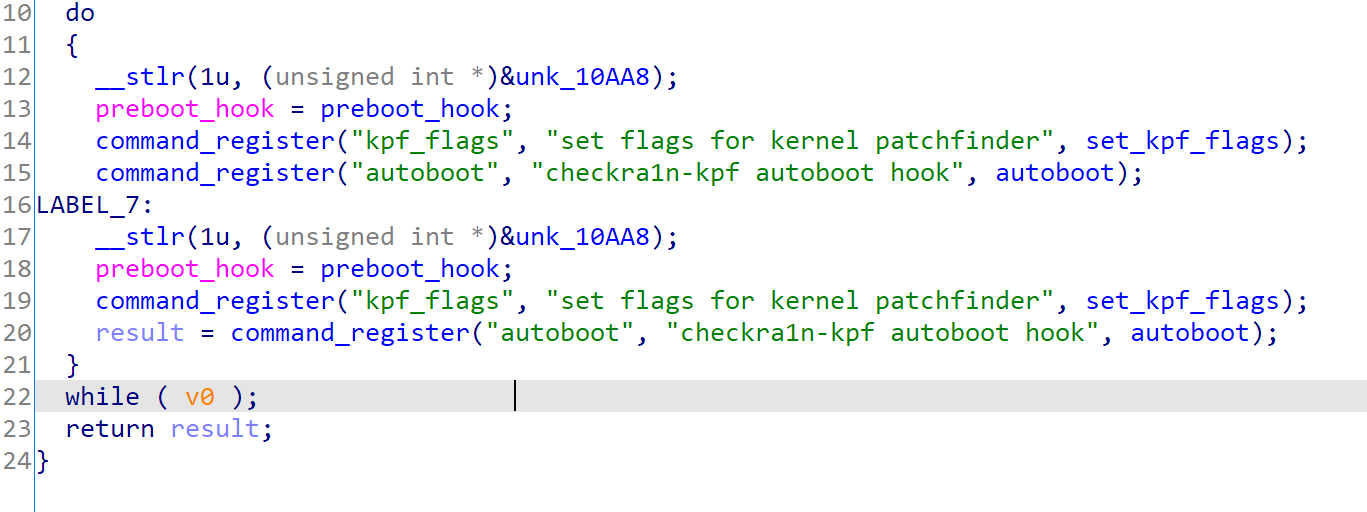
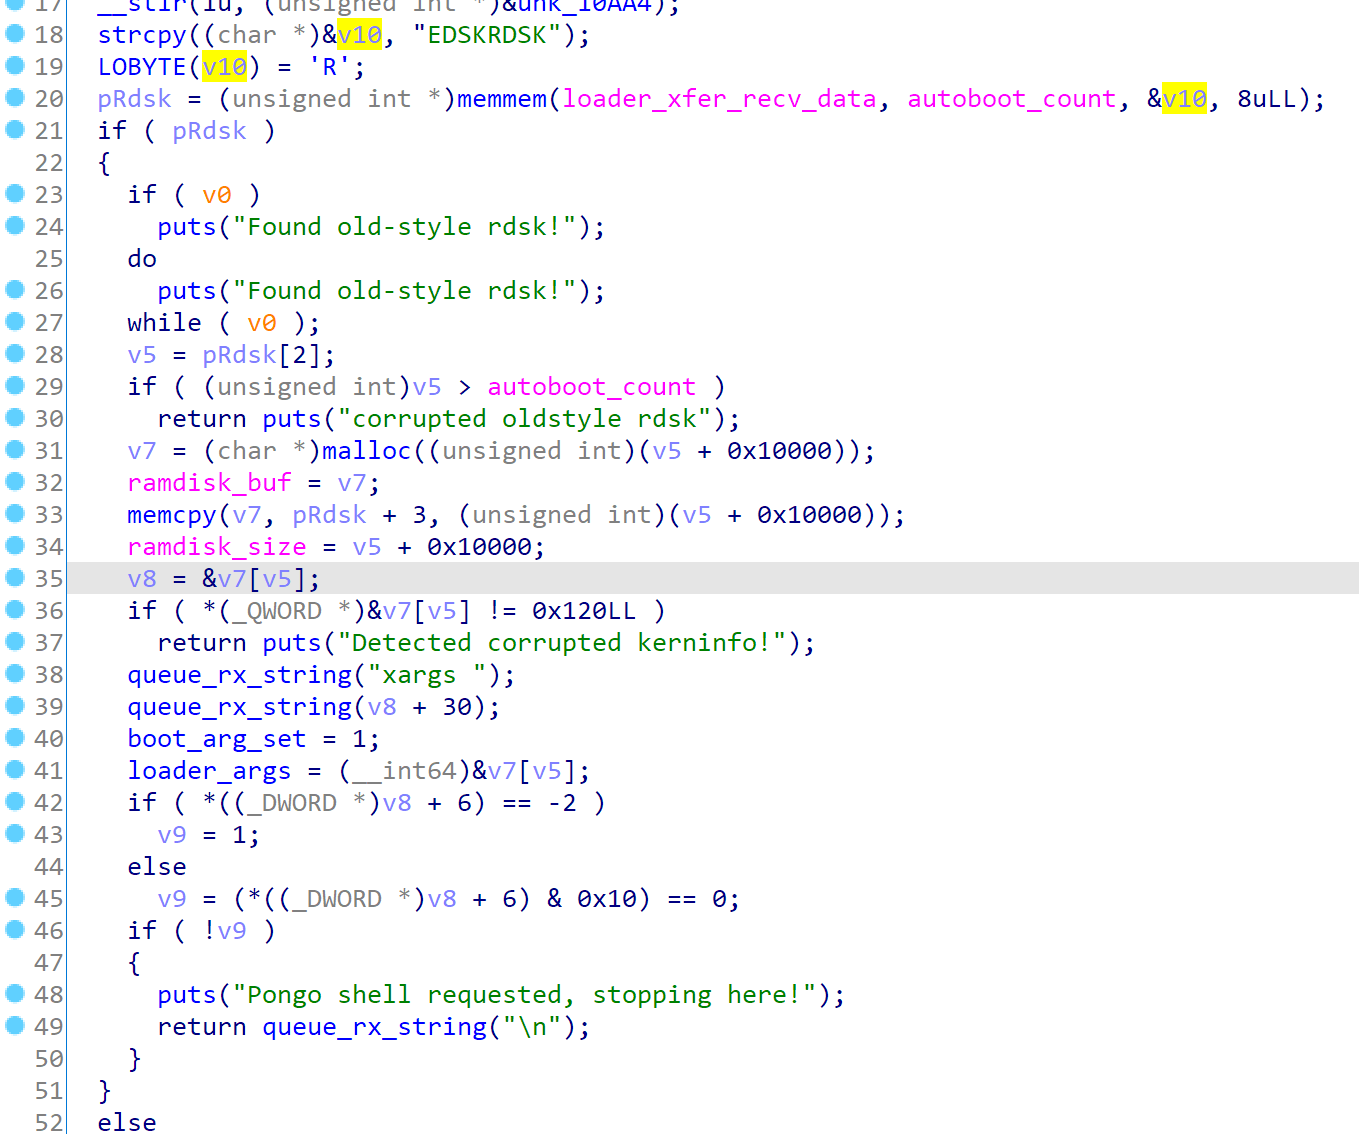
Autoboot
Then the autoboot is called by pongoOS. First it will find the RDSKRDSK sequence to find the additional ramdisk and loader_args. It will then copy it into ramdisk_buf.
I’ve made a 010 editor template to extract the informations.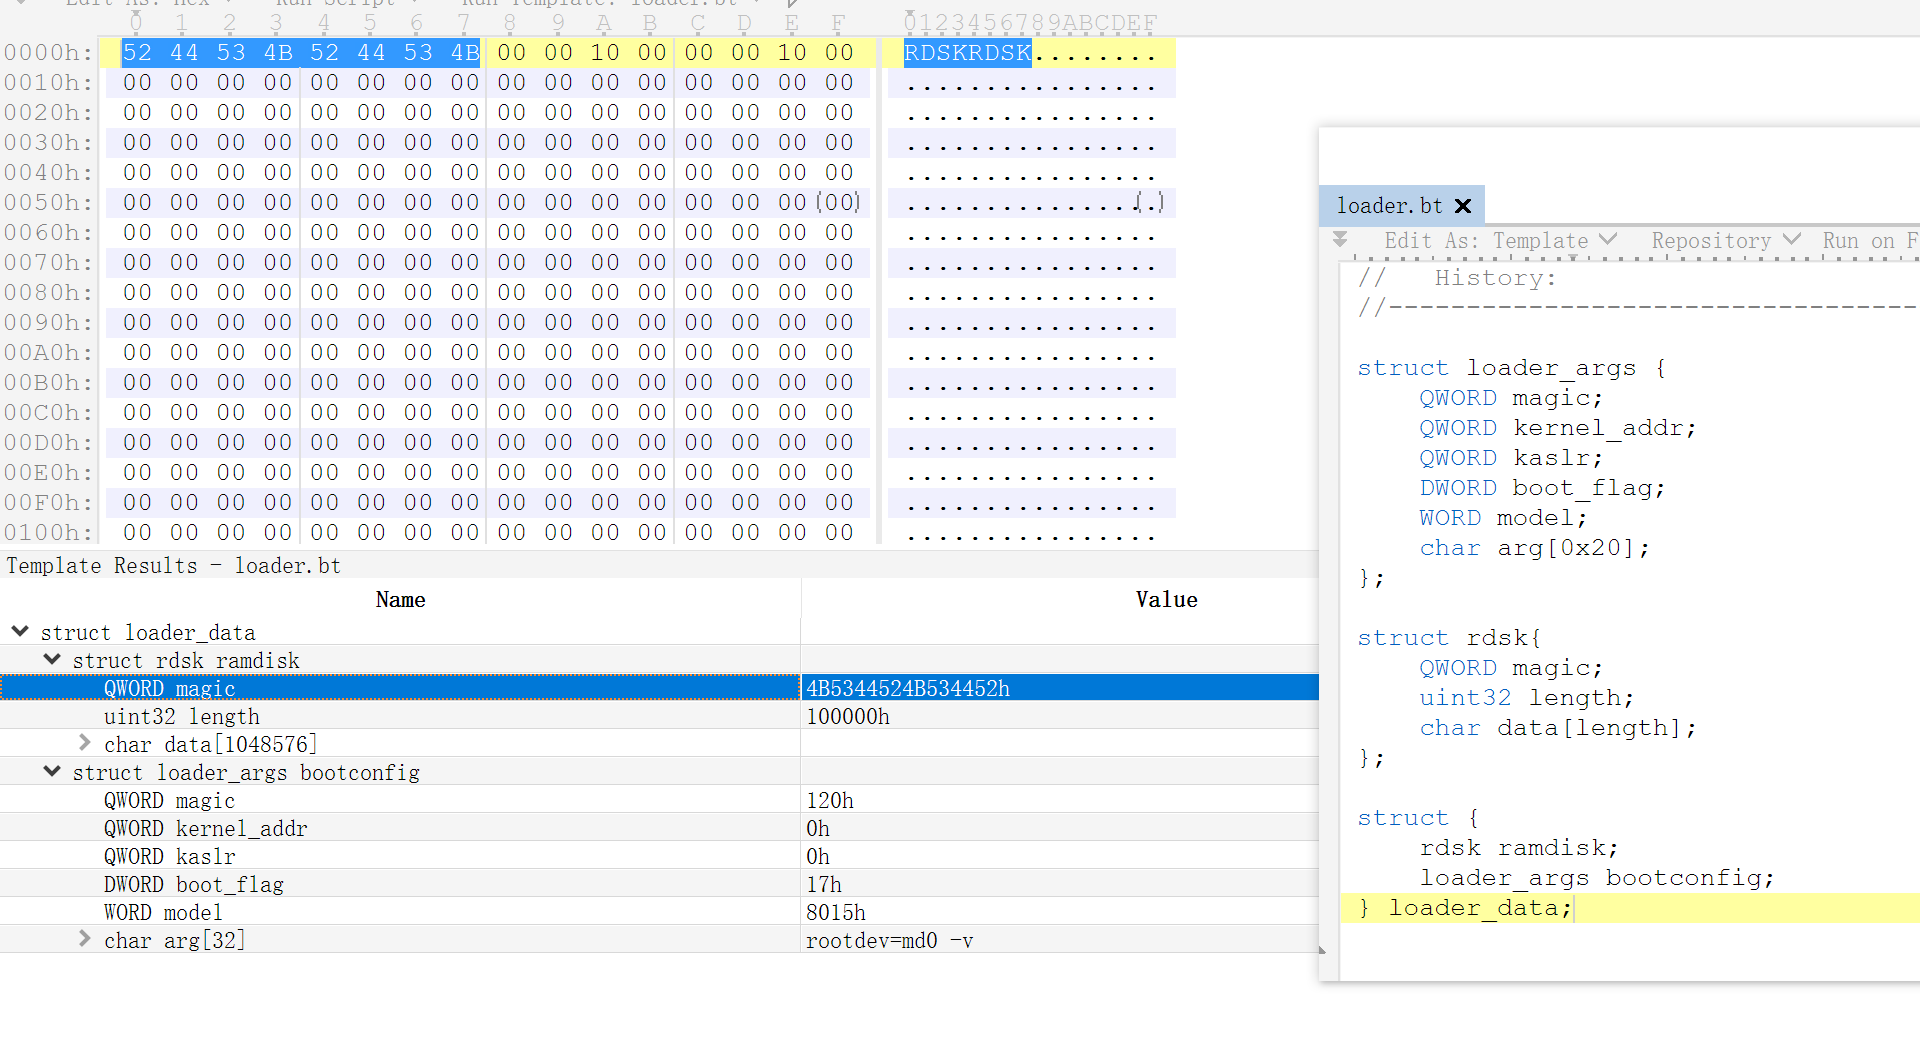
If pongo shell is requested, then it won’t continue. If not, it will re-register the shell, to abuse the “modload\nshell\n” command sequence
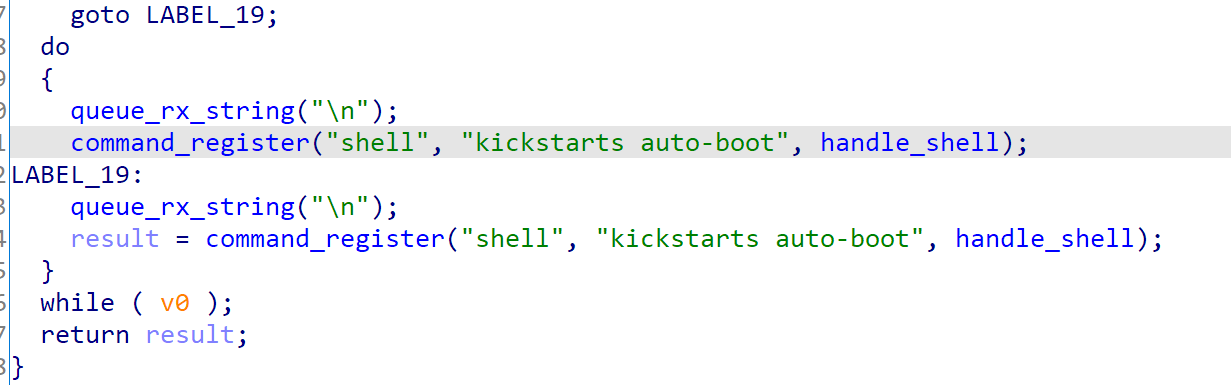
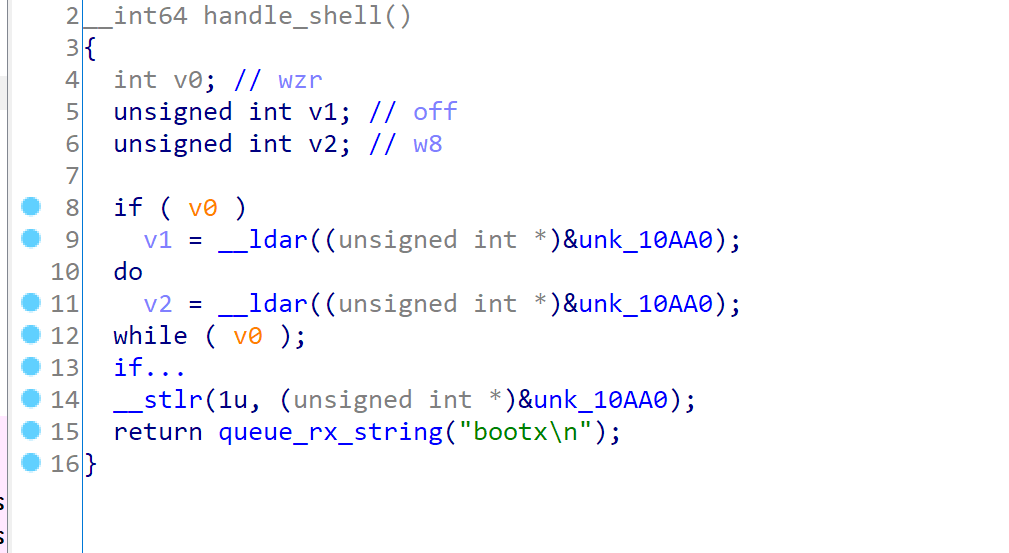
In the handle_shell it will simply execute “bootx”
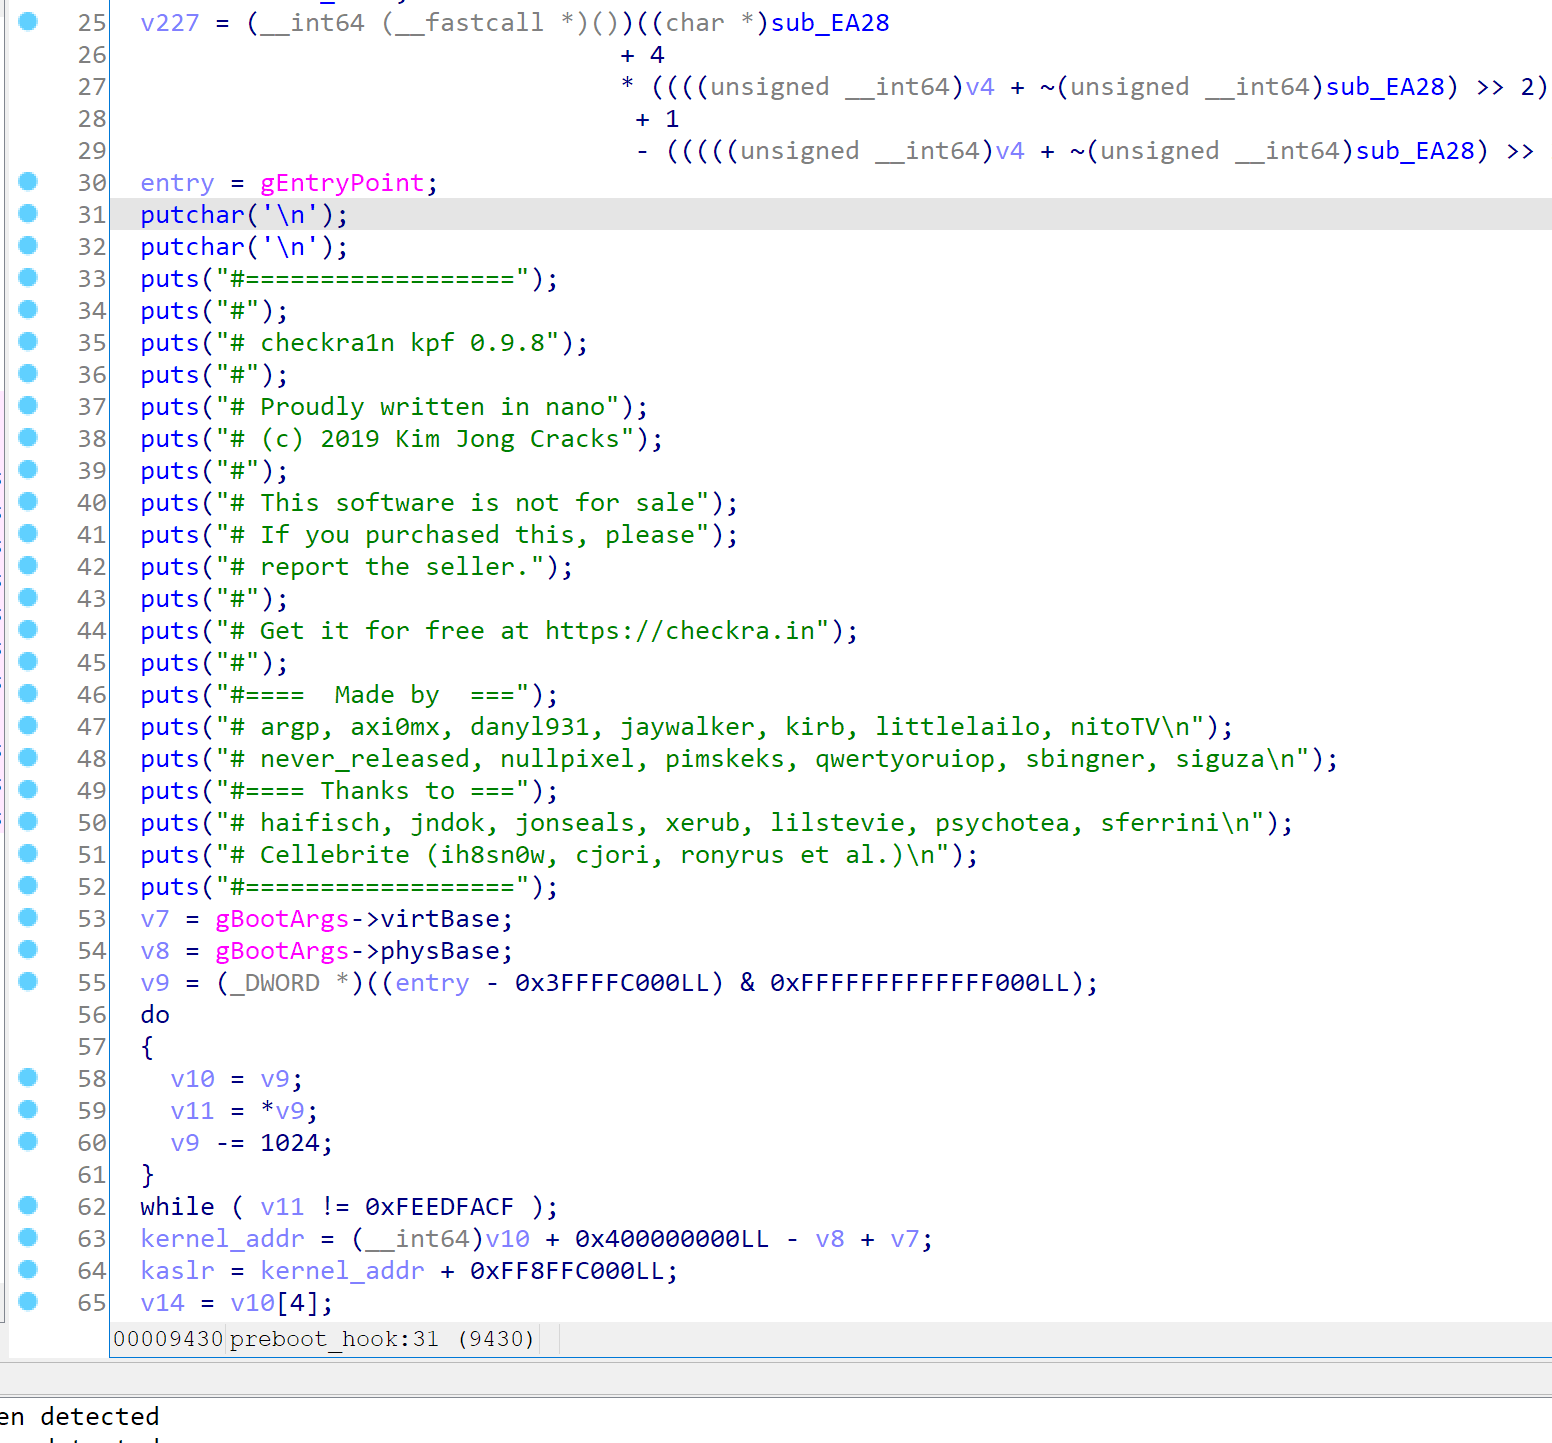
Preboot hook
Before boot, the preboot_hook will be called. And the main patchfinder logic is located in the preboot_hook.
It will find the kernel base by searching MachO header upward from gEntryPoint.
Then it will do all sorts of finding and patching~
Making debugging module for pongoOS
We’ve gone through the whole pongoOS and kpf, and now we have complete and in-depth look to the pongoOS. It’s time to do some experiments.
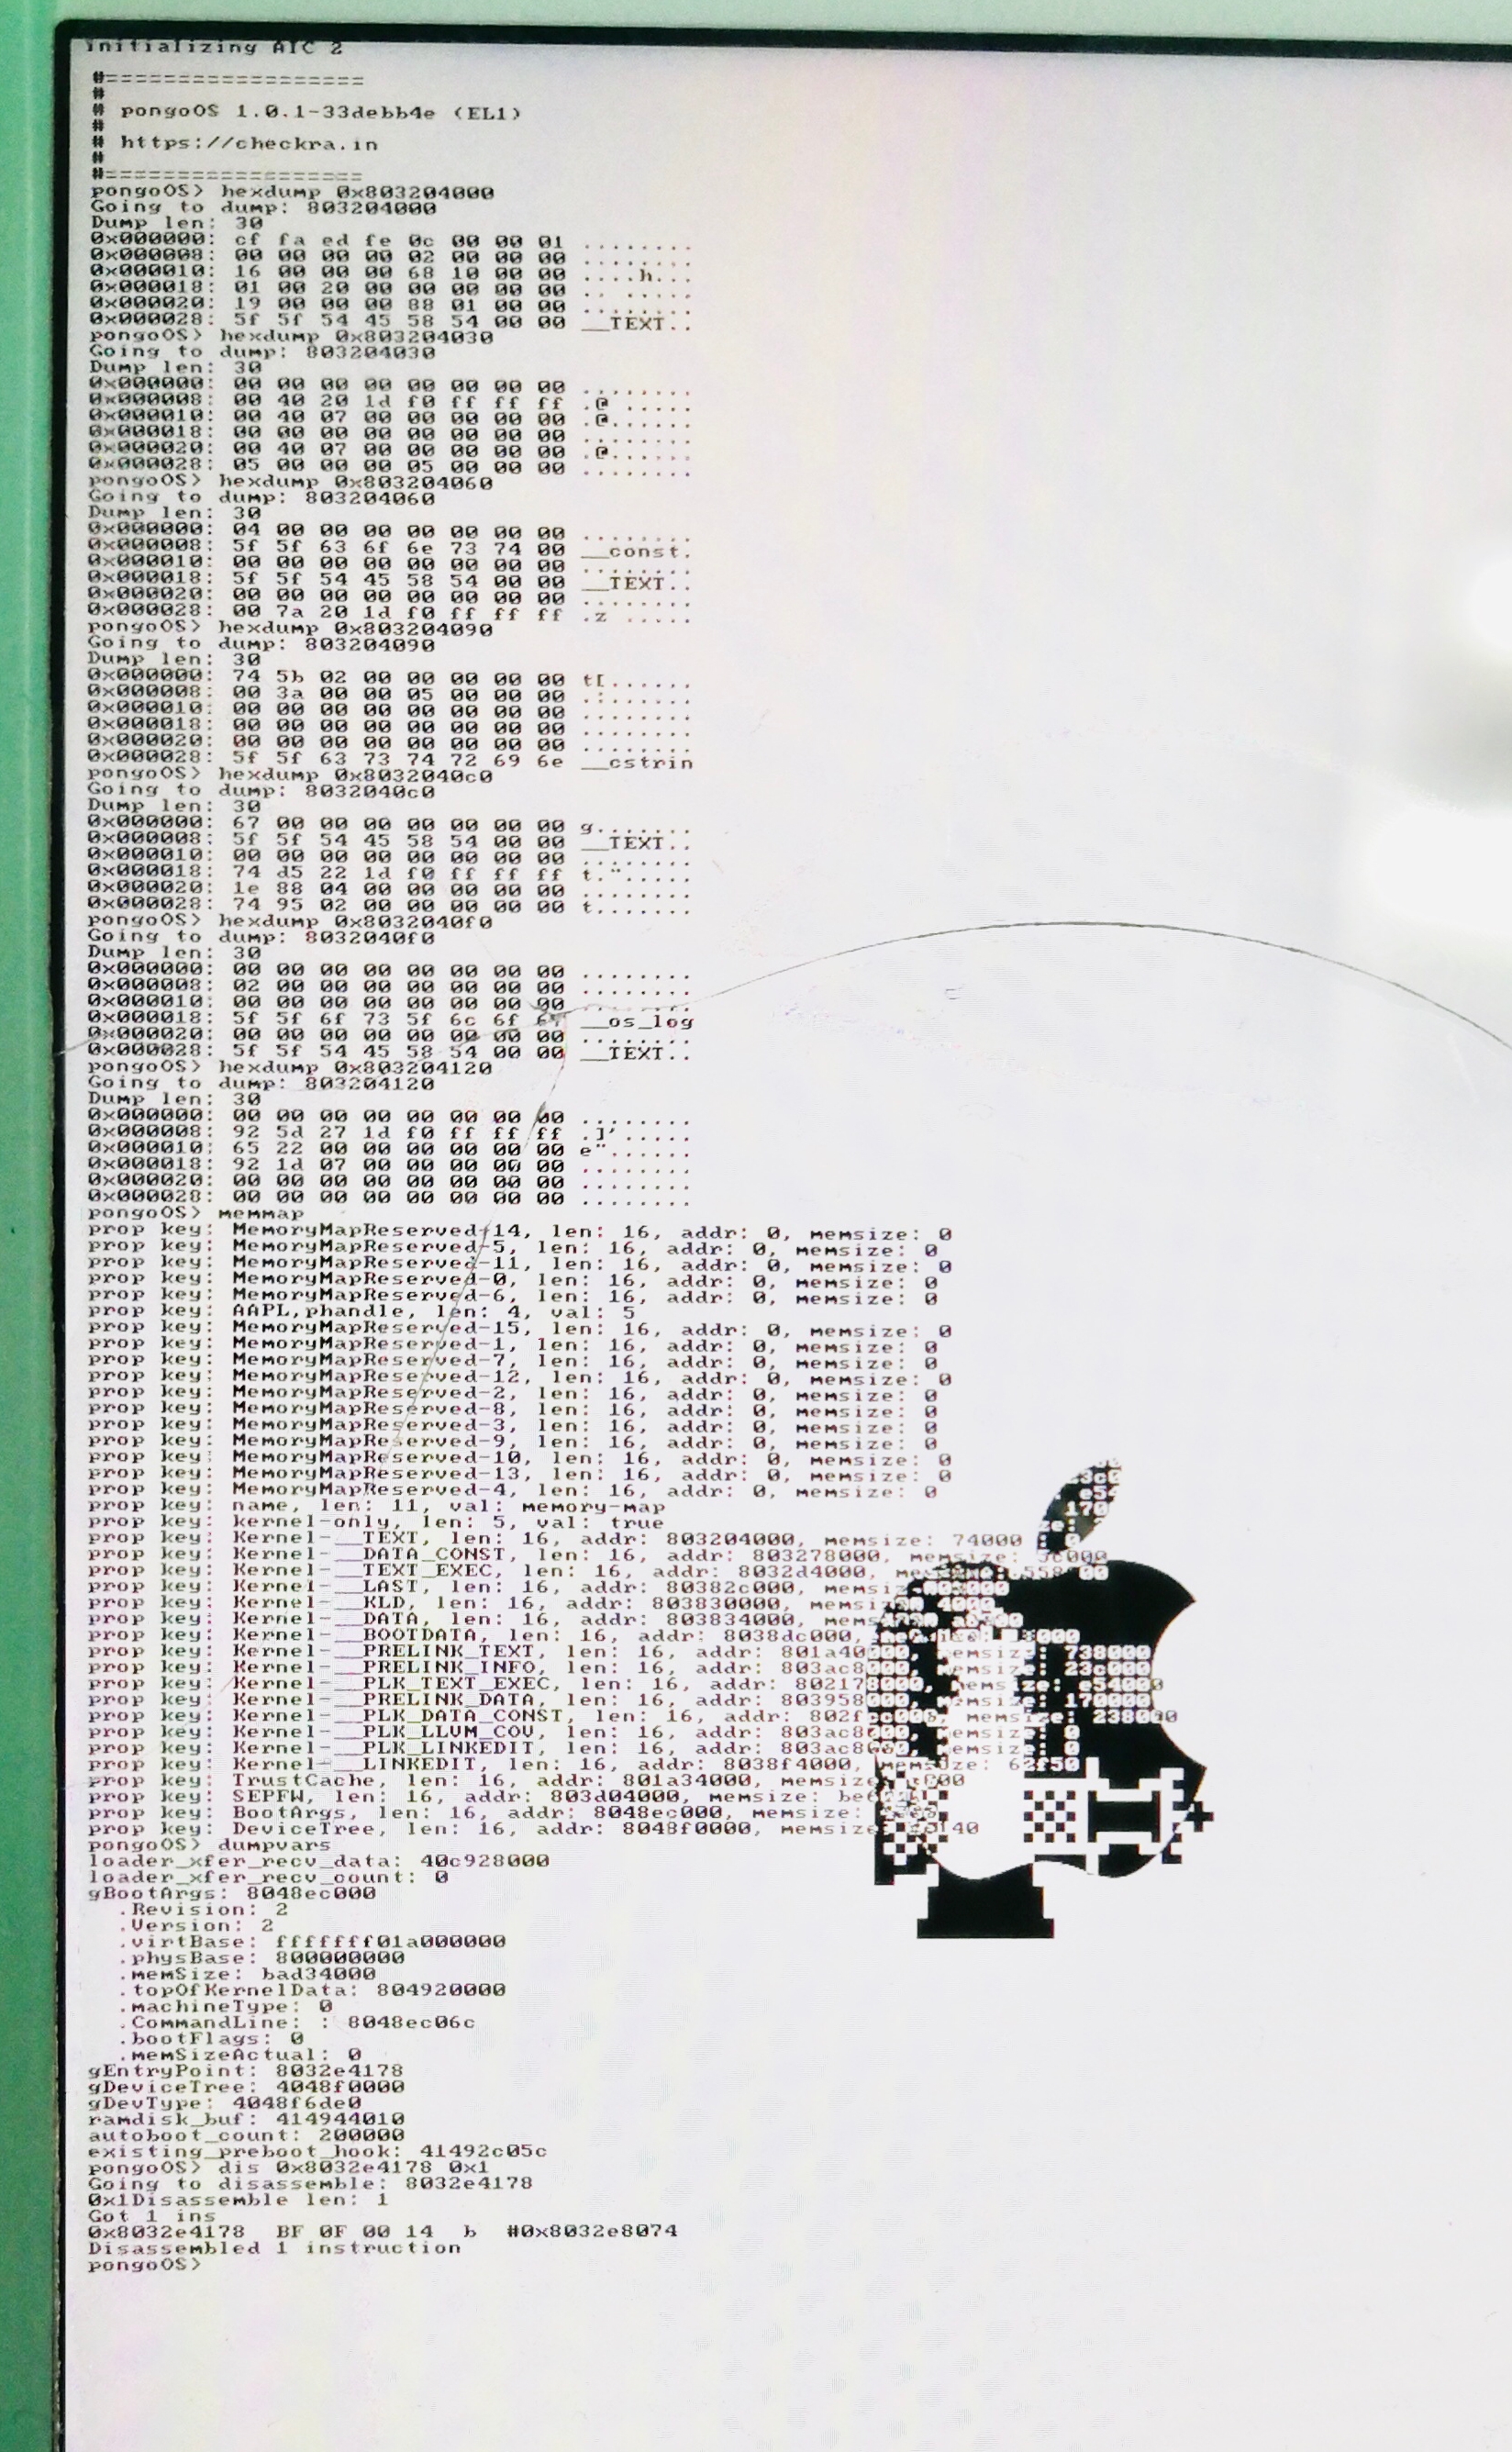
Integrating capstone and a embedded printf implementation, I finished a small module which allows you to dump pongoOS exported vairables (entrypoint/bootarg/devicetree/etc.), operate on memory (read/write/disassemble/search/hexdump), and print out the memory map located int device-tree.
It’s very hard to write modules for a kernel without detailed documents or source code or thorough analysis. This module in fact provides an example using many pongoOS export functions, which will possibiely make others feeling better developing on pongoOS.
Due to we are still operating on bare-metal, the memory access is a big trouble. We must access the memory in an aligned way. And we need to manually barrier the memory access, which is even more frustrating. As this is only an Proof-of-Concept module implementation, I’ll simply not ignoring those :) So if you have random crashes, change your parameter a little, or be patient and re-run the checkra1n, it’s really fast.